by rene
Share
Chinese product, which boasts on the packaging a frequency of 100MHz and a sampling rate of 1GSa/s, from the top of the display has two BNC connectors, 1kHz rectangular signal output, two LEDs – green Over and red Power, C usb connector and a push-button switch. The oscilloscope acts more like a toy for avid hardware disassemblers or inveterate electricians.
The oscilloscope is quite heavy if one expects a blank cover. After switching it on and initially sniffing each other, I find the controls quite unintuitive, where the user presses the time base icon or the input voltage divider icon in vain and nothing happens. Ete that there is an auto set icon . It’s a miraculous icon for students and beginners. When you connect the signal and push the icon, the oscilloscope oscillates. After a lot of getting to know it and not reading the manual, we find out that the time base is switched by double tapping the screen. If we tap right the time base speed increases, if left it decreases. However, the input voltage divider could not be tapped, even if we made a fin out of a finger. However, it goes the other way. When the CTRL icon is pressed, the menu switches to CH1 and CH2 with an intuitive V+ and V-. It goes and switches, great news. Input binding and input properties can be switched intuitively via the CH1 and CH2 icons at the top of the screen (these are different than the ones I wrote about a while ago). A bit of an unconventional menu, but it’s easy to get to grips with. The oscilloscope also includes such niceties as horizontal and vertical cursors, which can be moved by sliding your finger across the screen (you have to get used to it going differently than your finger, though.) Meanwhile, they can measure Delta V or Delta t. What is a very handy feature, however, is the MEAS URES icon, allowing you to measure Vmax, Vmin, Vpp, Vp, Vrms, Vavg, Freq, Cycle, Tim+, Tim-, Duty+, Duty- for each channel (if I didn’t mention it, it has two of them).
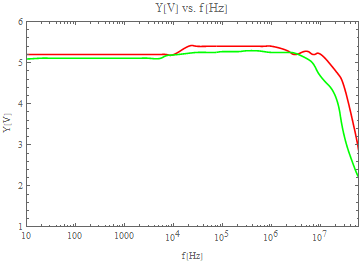
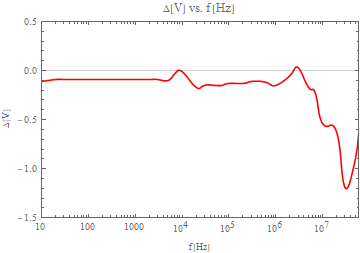
Curiosity got the better of me, so I measured the amplitude frequency characteristic of the oscilloscope. I compared it with a professional digital oscilloscope TEKTRONIX. The results are in the previous pictures, and in the measurement I found the Chinese oscilloscope to be more stable in the result than the Tektronix. The generator used was up to 60 MHz, but at this frequency, it was already breathing its last, shrinking the amplitude of the output signal, which is also captured in the previous pictures. Red Tektronix curve and green Table osc. The Table osc. on the AFCH can also be seen a decrease.
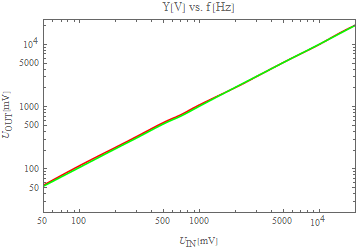
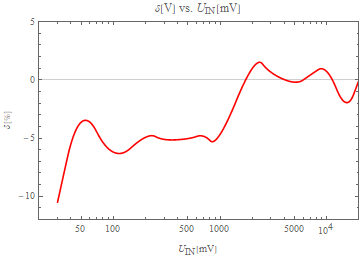
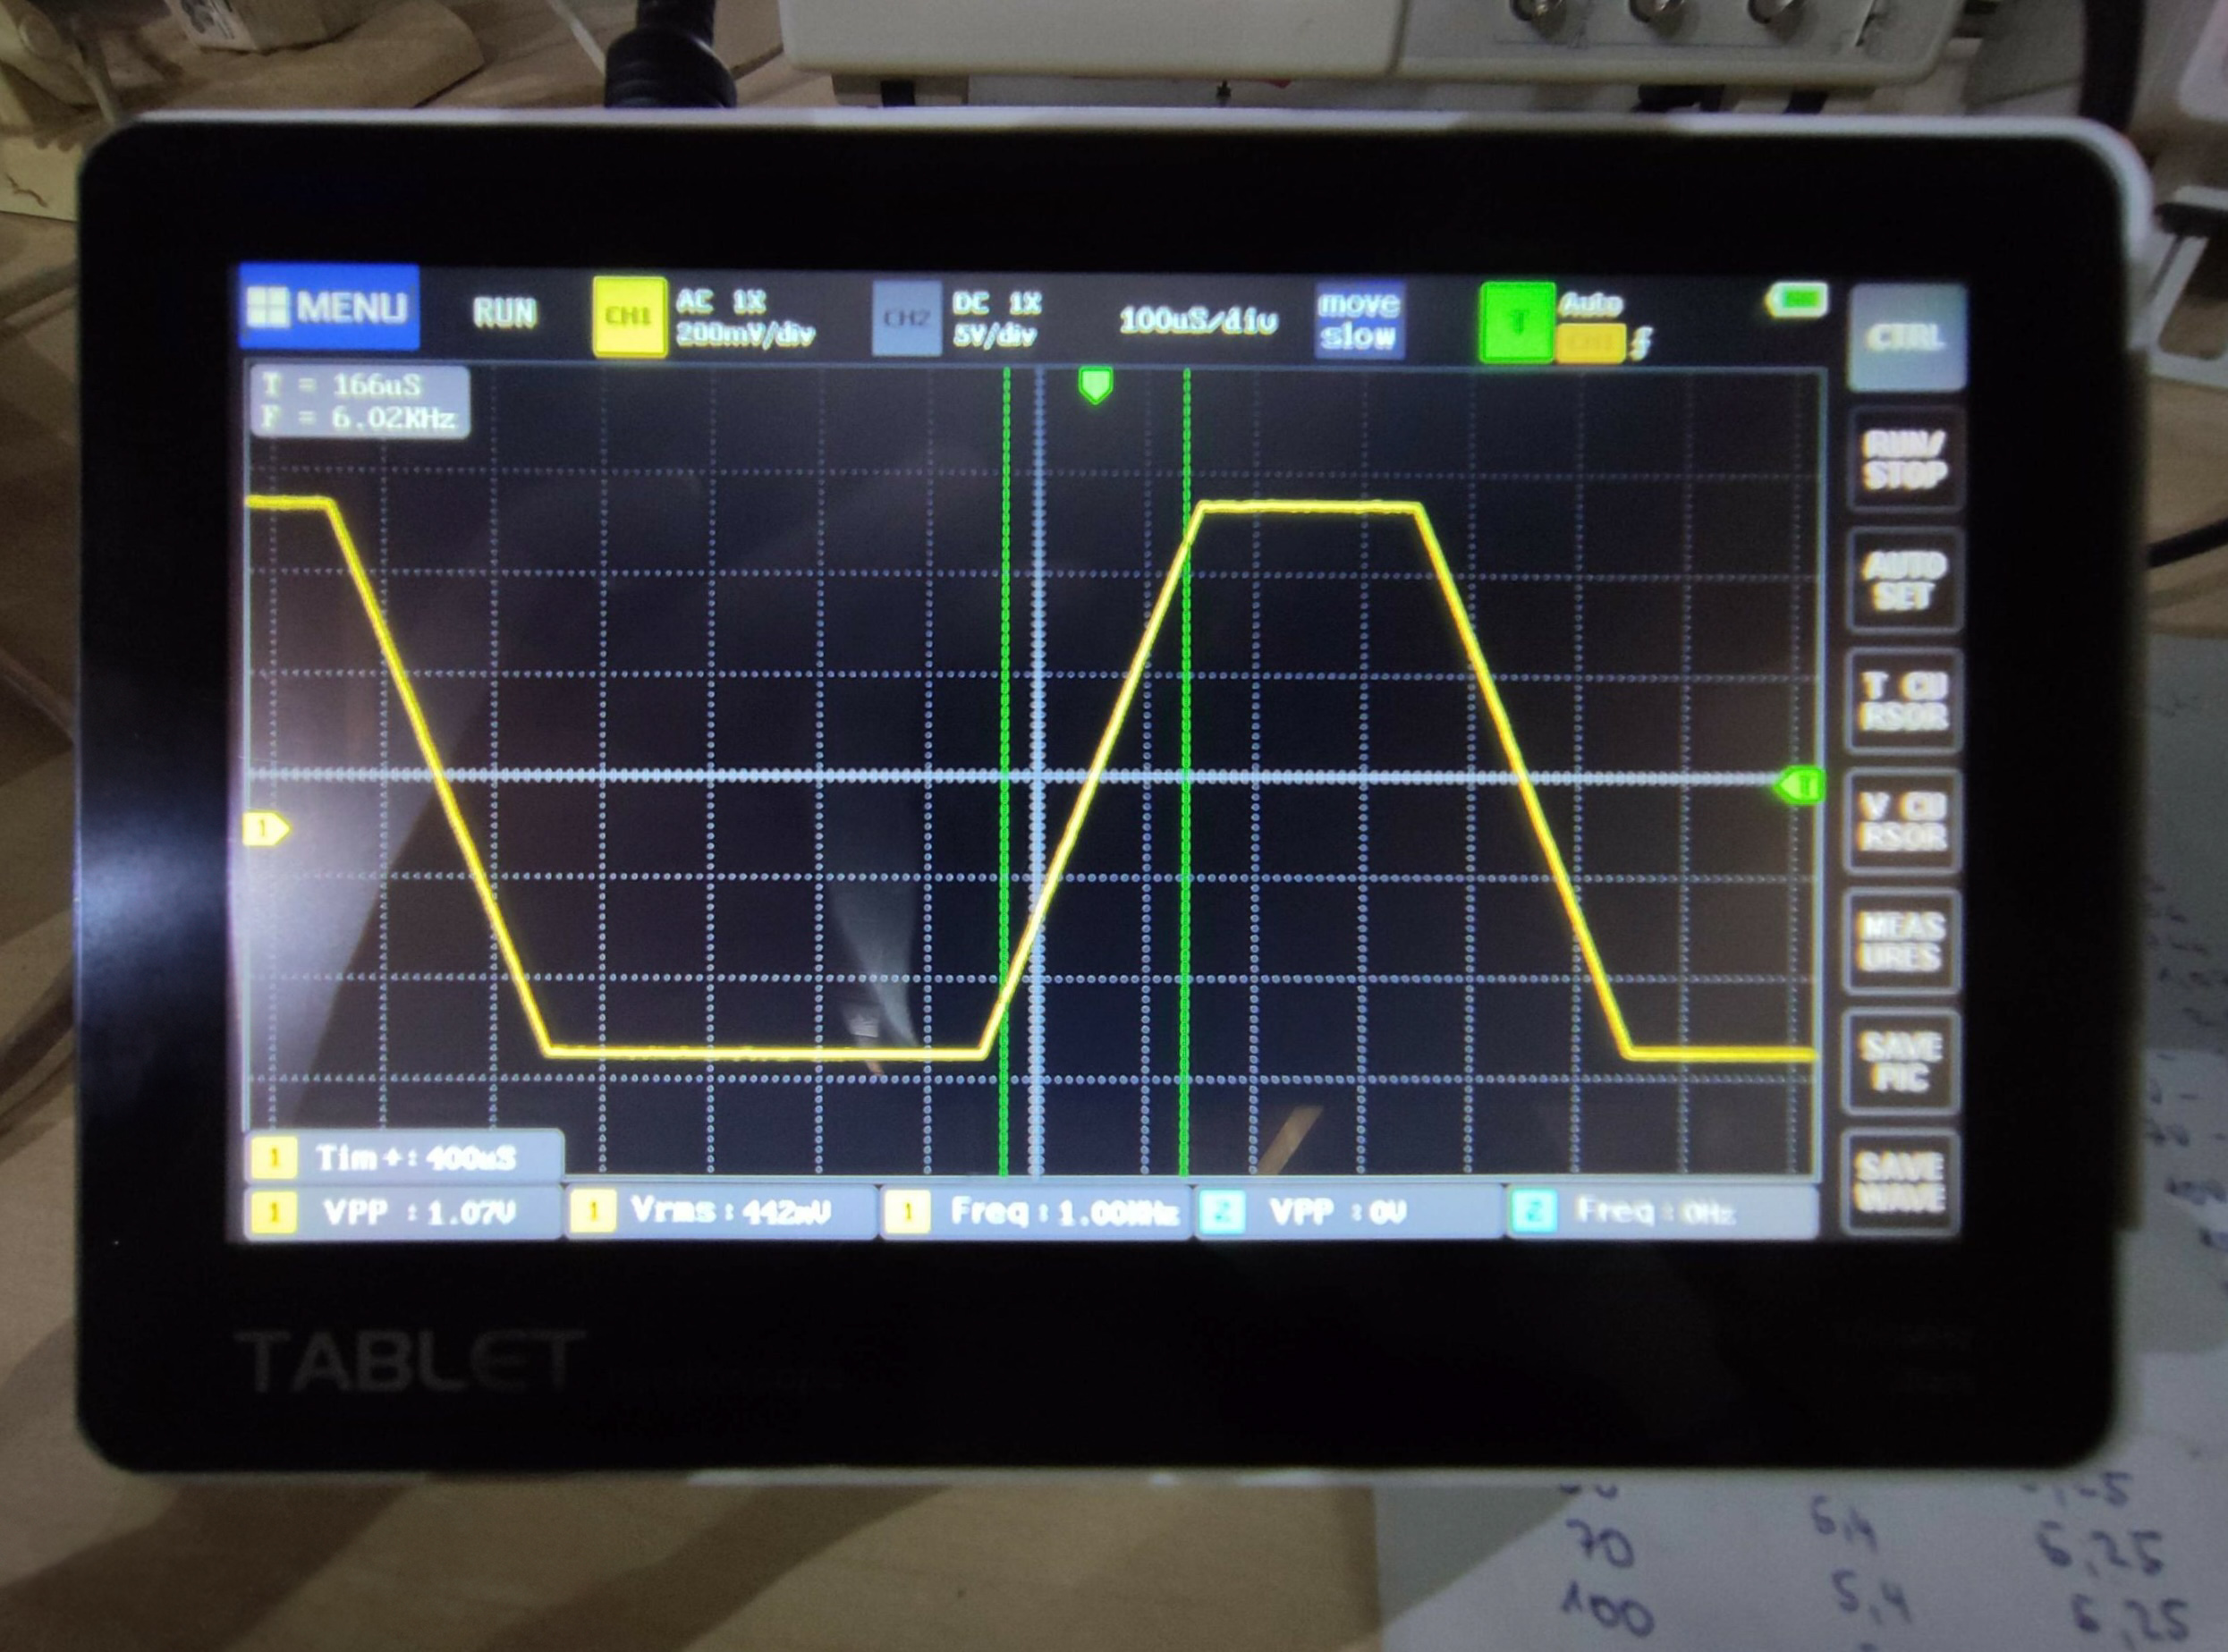
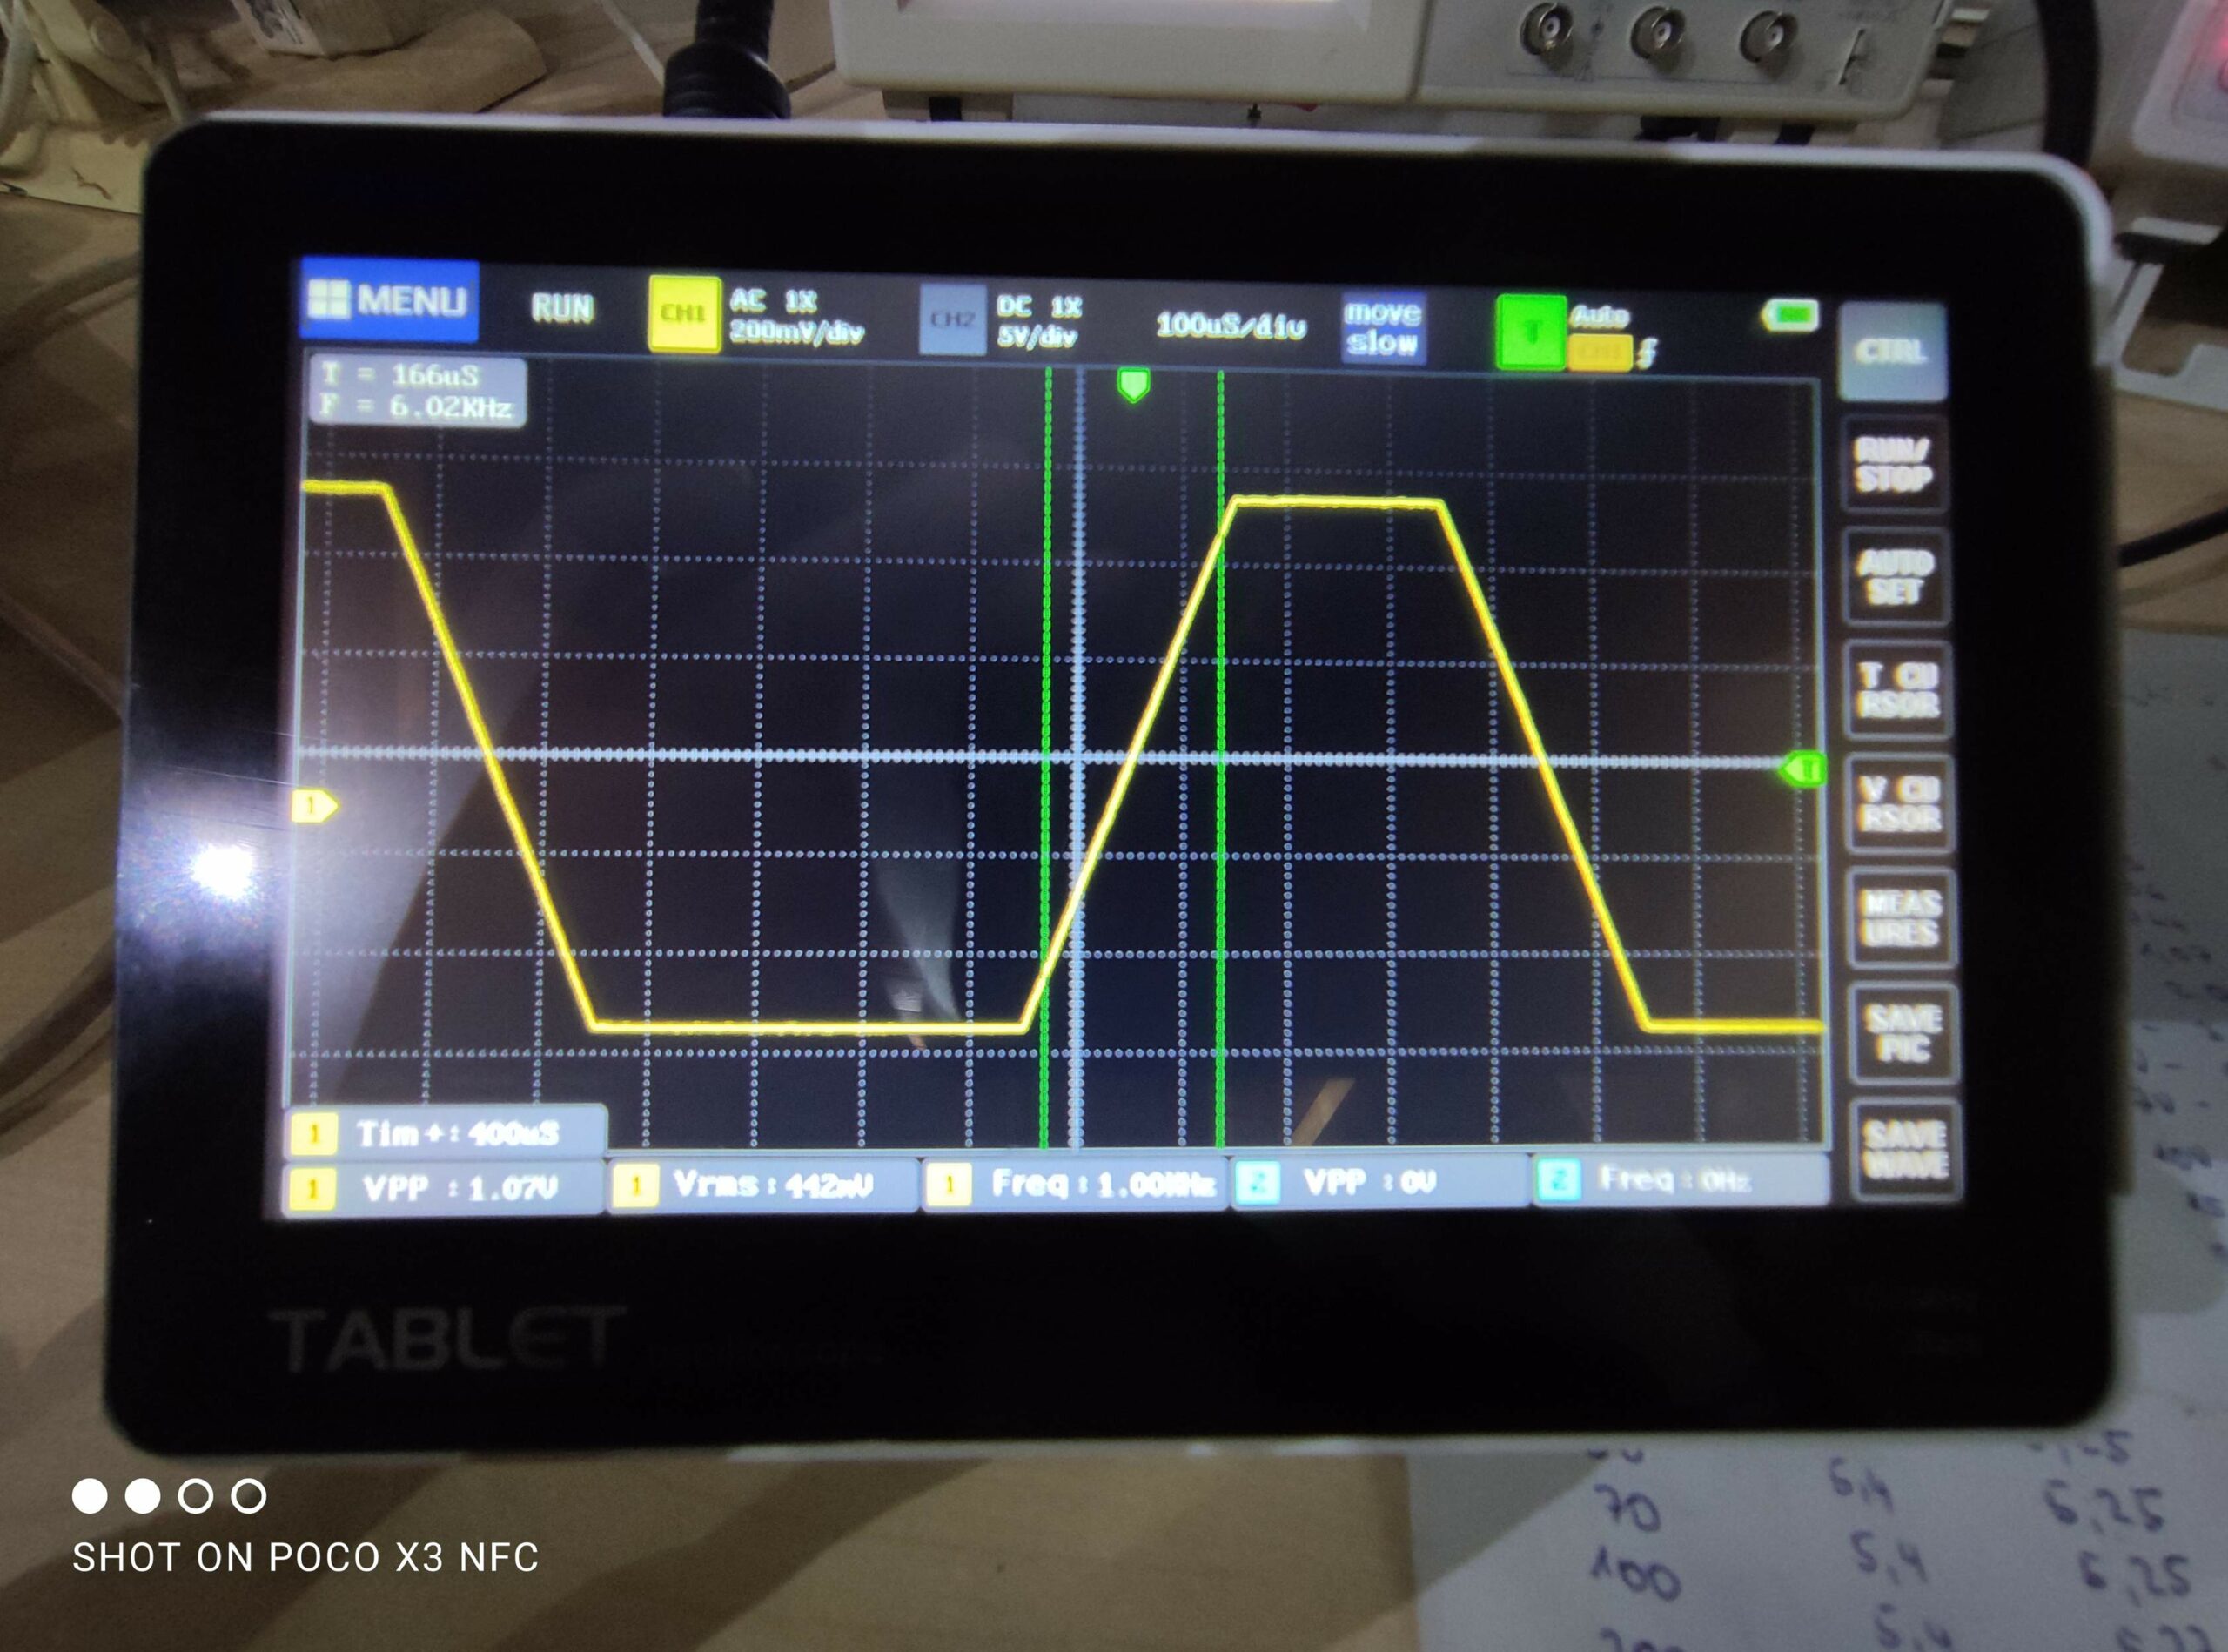
As for the amplitude characteristics, Table osc. started to display a signal from 30 mV onwards, at lower signal values it pretended to have nothing at the input. This characteristic was measured at an input signal frequency of 1kHz and shape – sine. At tens of mV the amplitude error was about -10%. At hundreds, about -5% to 0%. The result is really interesting. When measuring the leading and trailing edges, the cutoff frequency of the oscilloscope showed up. Fast edges: Tekronix 8.2 ns, Table osc. 24 ns. Slow edges: Tektronix 164 us, Table osc. 166 us.
Conclusion:
Oscilloscope Table osc. pleasantly surprised.
Remark:
I haven’t tried connecting to a computer and transferring data, but even that will happen someday.
ZOSTANTE S NAMI

